
If you require a new level ride air compressor for your Adventra we have a solution that we’ve sold and fitted to client vehicles, they are a direct fitment see the product details here.
Increase in contact with me has raised me to make a post about this so people can see visually what I’ve done to modify my level ride system to use it the way I am currently.
To explain the factory condition uses a very basic controller that commands the factory air compressor to push air into the rear shocks or release air from the system based on the controllers arm state and that arm position is based on the physical height the rear of the Adventra is at. It’s important to know that the arm must remain in a particulate position for around 15-20 seconds before the level ride controller will tell the compressor to air in or release air.
I have made a switch that allows me to temporally disable level ride’s normal operation when I go off road for a number of reasons, first if I get hung up on a rut or on a angle for longer than those 15-20 seconds the level ride system may begin to release air thinking that my rear end is too high and in most off road situations this is not good it’ll either beach me or could make my situation more worse as two examples of many.
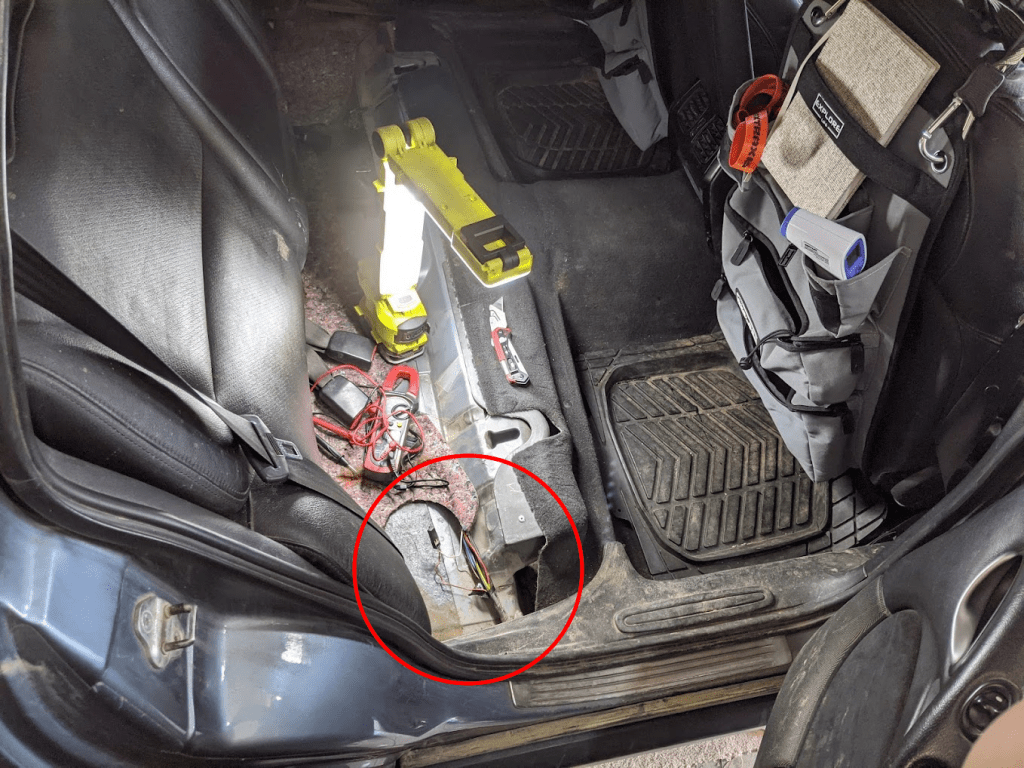
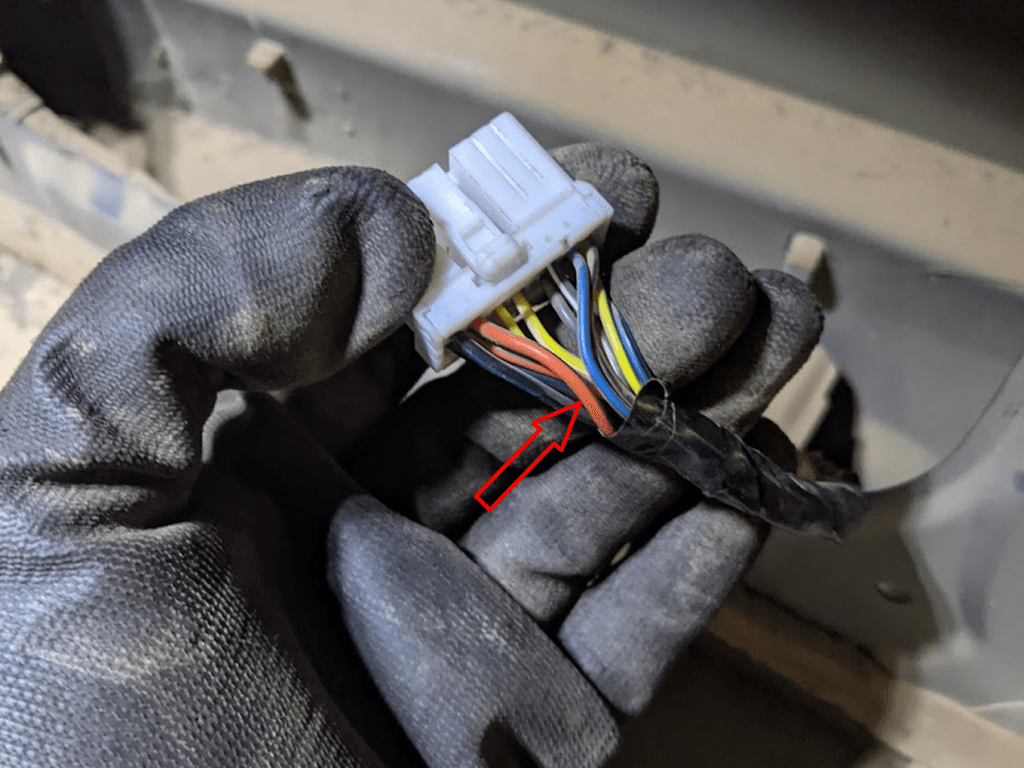
So when I go off road I have a switch that breaks this circuit below, you can access this set of wires by removing the rear passenger seat, the bottoms just release if you pull the tabs at the bottom of the seat and it’ll come straight out with no tools needed and you will be presented with these wires on the driver side of the rear seats.
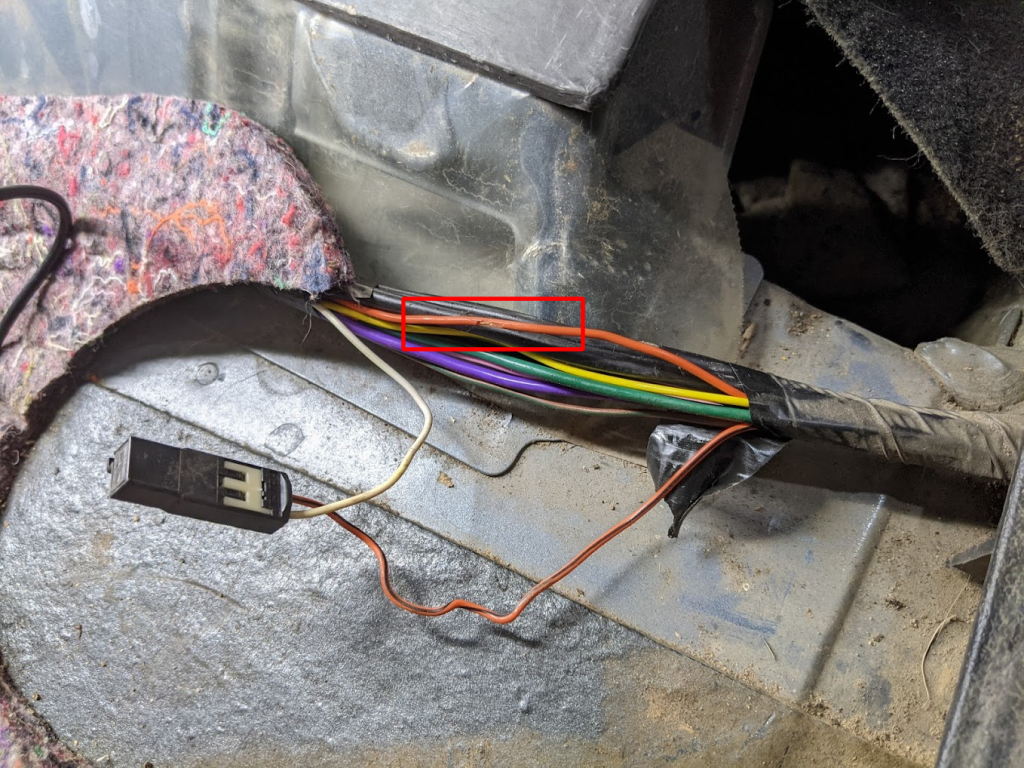
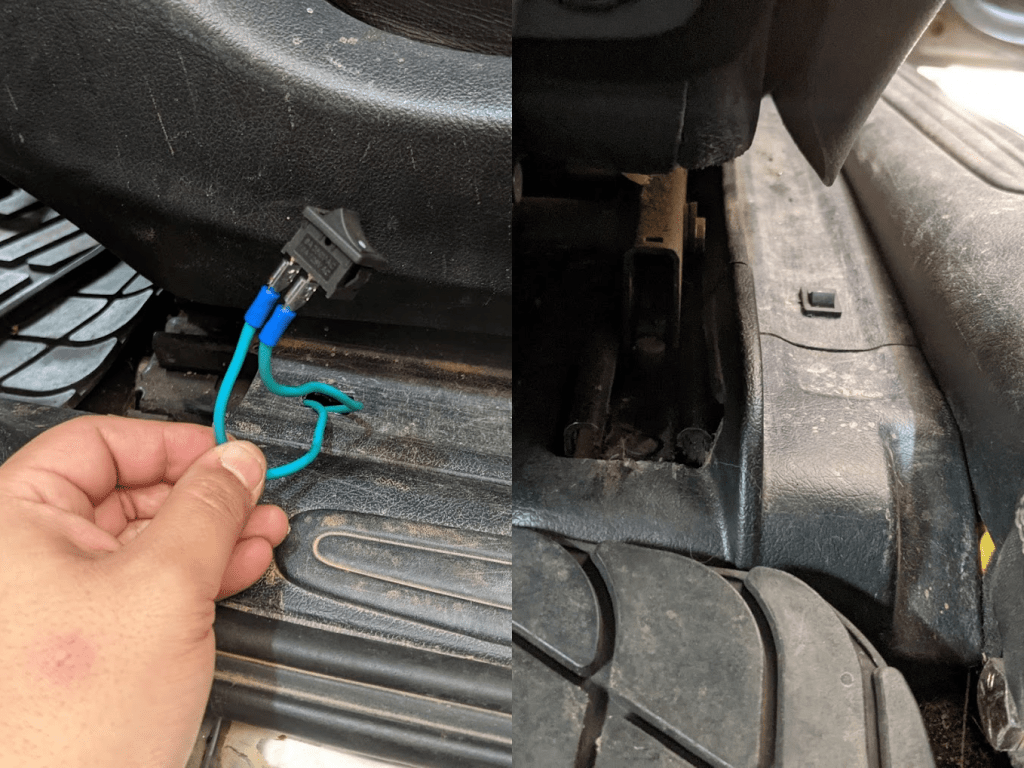
Then it’s a matter of just cutting this orange and black wire here and then putting a switch in to break it when you want to disable the default level ride control system for me I ran this back to the drivers seat and put a switch in there.
My switch location in the front from what I tested there is no might current through here so just a switch is fine. The working operation here is whenever the circuit is active it will raise and lower the Adventra based on current rear height when turned off you can set a fixed height and leave it – although if the rear air shocks are empty they do require air in them to drive on or you could damage them for this reason I always leave this on and only turn it off to manually put air in when I go off road and want a fixed height.
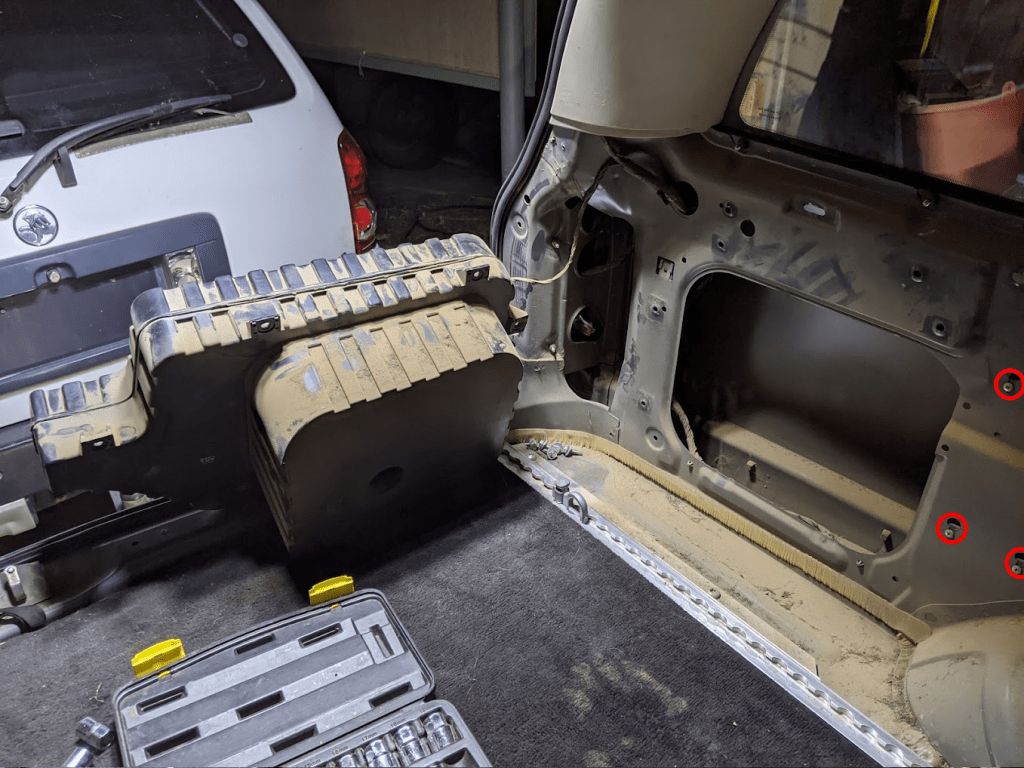
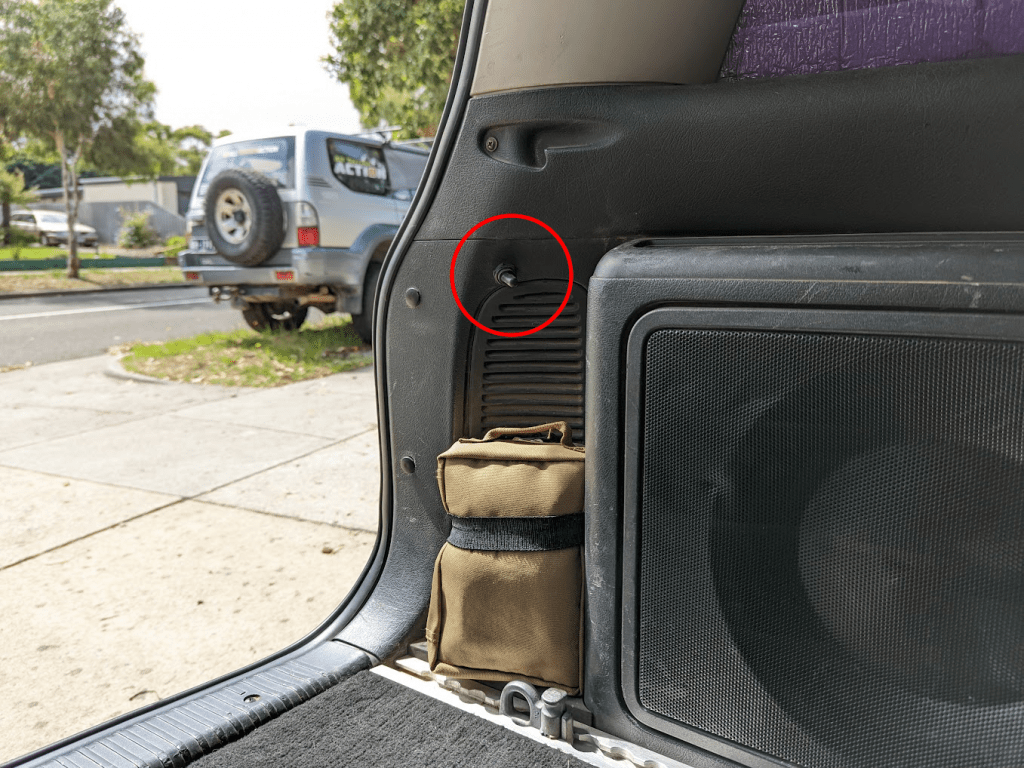
Next we need to create a give 12v power to the air compressor so to get some air into the airshocks the easiest way without running new cables was that I decided to source power from the factory subwoofer amp which you can get access to by pulling the plastics off and then removing the factory subwoofer box here.

Once you have the surrounds off, you just need to then remove the subwoofer box.

Once the subwoofer is removed you will be presented with a cavity behind and inside there the factory amplifier is attached behind, a few screws gets it off.
Out comes the factory amplifer.

Tip: While you have access to this turn the gain up a little on the amplifier, not to 100% but to around 80% and you’ll find you factory sub sounds 200% better than before. A good way to work out that spot is turn it to 100% and turn it back just under a quarter and you’ll be on the sweet spot.
Now with the amp removed we will tap into the always hot power to the amplifier thickest orange wire, make sure to have disconnected the battery from the car before playing with this or you might pop a fuse due to mishandling or worse short something out, this orange wire is always hot/live 12+ on a 20a fuse the air compressor usually pulls around 15a from my testing s as long as you don’t have the music blaring when you run the compressor later this will be sufficient and has not yet give me any issues. I even replaced the amp fuse with a 15a and it still did not pop when I ran the compressor for 30 seconds with the car turned on and music playing gently.
Once you’ve done a splice and stolen some positive 12v run some 10 gauge wire from this and drill a hole through your floor as this will let you run this cable to underneath close to where the existing compressor is.

Put your cable into a loom tube (so that rubbing wont cut through the insulation) and run it to a toggle switch capable of handling 15-20amps install the switch somewhere suitable.
Then run the other end back through the hole you made and down under the car.
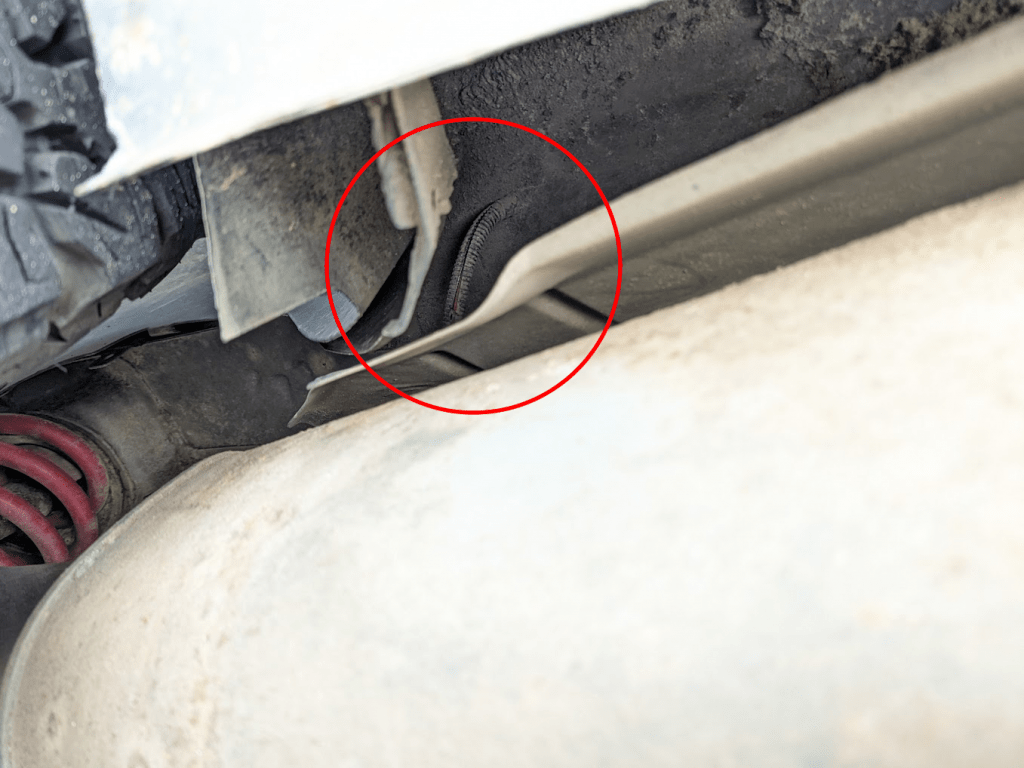
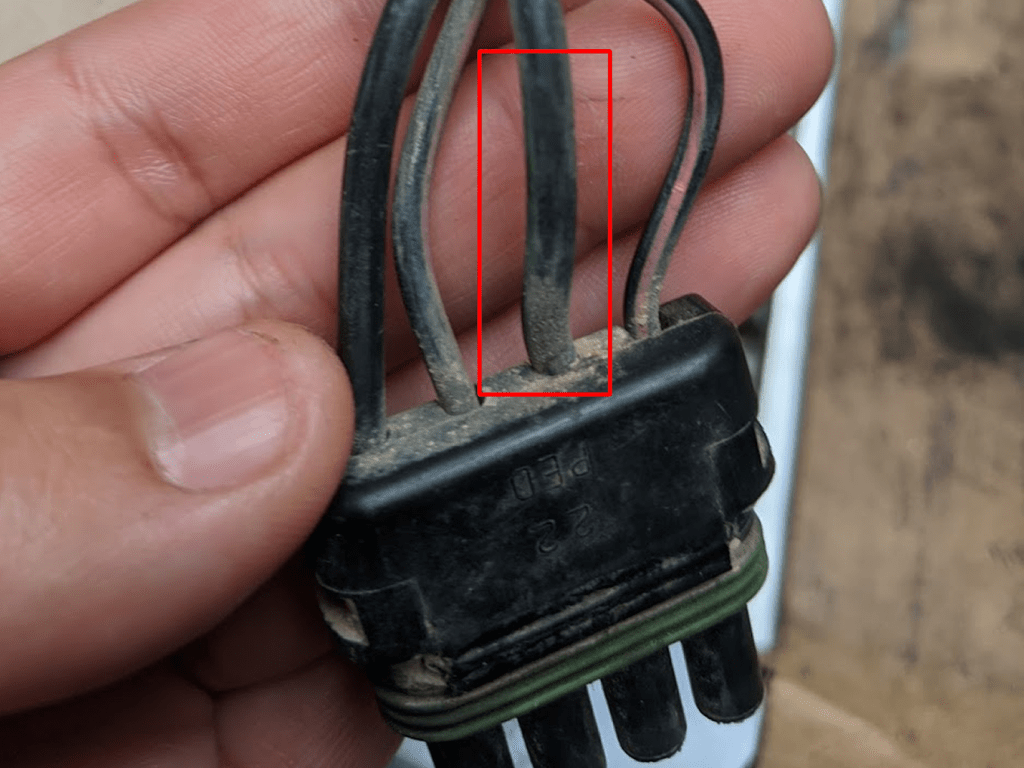
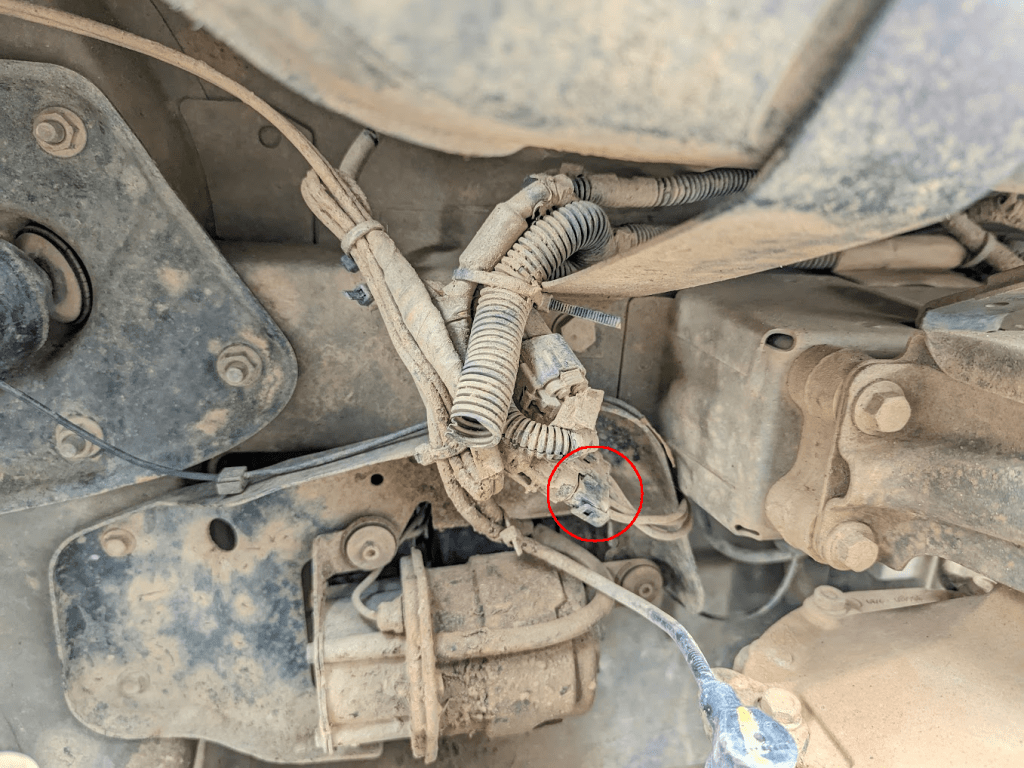
Once you have it out the bottom run this cable back to your air compressor and remove its connector you want to splice a link onto the black and green cable pictures below off the air compressor plug, I don’t have a photo of it installed under the car but there are no other plugs that are the same as the one picture below in this area of the vehicle.
I have not had any negative effects after 1 year of use like this without a 1 way diode, but if you are worried about 12v positive going back to the computer or level ride controller you can put one in if you like.
Once this has all be reconnected, battery reconnected and put together you can cable tie everything up you can go do some testing.
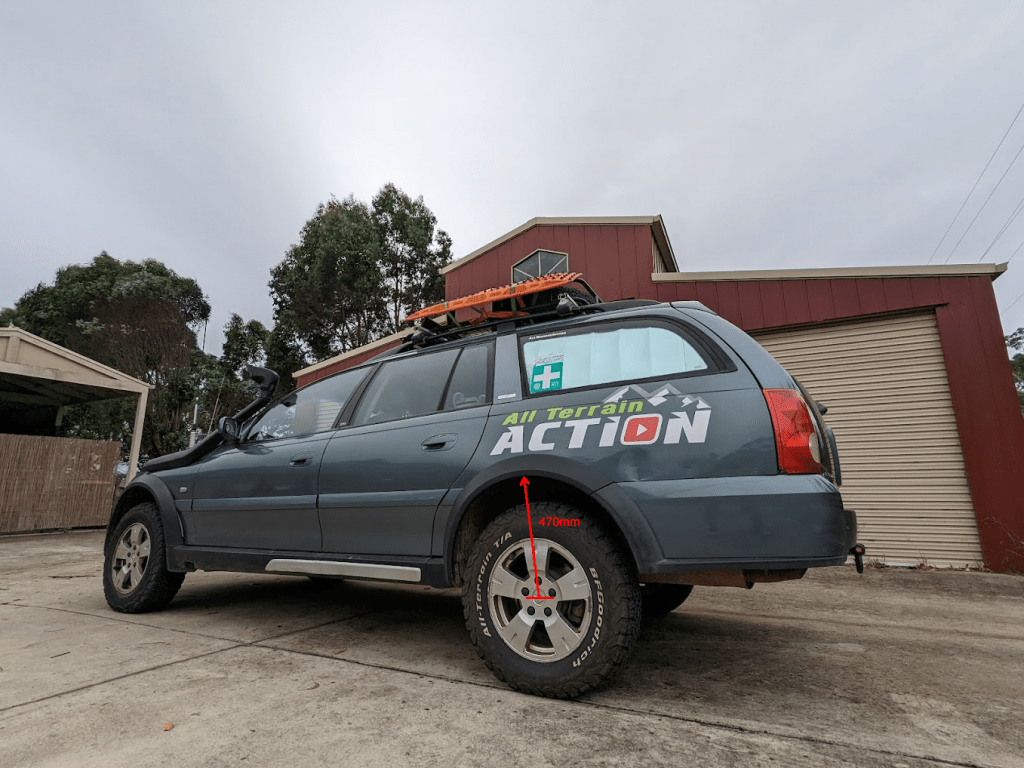
You should now be able to go to your switch beside your seat turn that off (break the circuit) then turn the toggle switch on whenever you installed it and hear your air compressor go on it should slowly over a minute filly the air shocks up raising your vehicle. I have found a safe lift to around 470mm from the center cap point on my wheel to the wheel arch but I have raised it to 490mm off road to get more clearance to clear an obstacle I was getting hung up on I just wouldn’t recommend it that high at high way speeds – CV’s been the most questionable part not enjoying the angle.
As soon as you want the air shocks to return to ‘normal’ operation, just flick the switch back to on next to your drivers seat and everything after around 20seconds will return back to normal operation you can do this while driving as its designed to change height in motion.
Warning: The compressor does not have a safe cut off, meaning if you turn it on and never turn it off, it will keep going until something goes bang or cooks, so when manually putting in air stand and wait don’t go off to do something else because you’ll forget and it’s for this reason I installed my toggle switch at the back so I have to be standing there to activate it. I did think a press to activate button is better, so that if I let go it stops filling air – an idea for someone else perhaps.
If you have any questions please consider becoming a Patreon here https://www.patreon.com/allterrainaction and then asking your question directly to me that way, its a great way to support our channel and website.